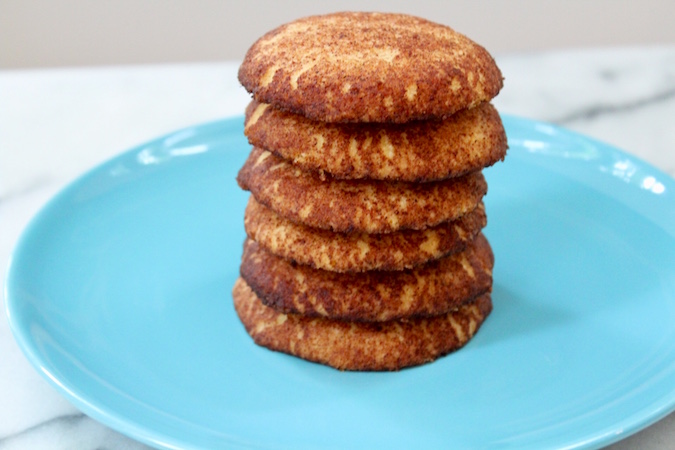
Snickerdoodle Cookies
Snickerdoodles
One of my favorite things to do in the kitchen is to recraft classic recipes into healthy delights. These snickerdoodle cookies are a great example of a classic cookie made over into a healthy treat. This recipe was adapted from Martha Stewart’s snickerdoodle recipe. I’ve artfully reinvented it to be gluten free, sugar free, low carb and plant paradox complient. This cookie is now the perfect guilt free, gut friendly treat! They are full of healthy fats so, if you are watching your weight, please make sure you enjoy these only when you are eating low carb foods before and after.
- Prep Time: 15 minutes
- Cook Time: 10 minutes
- Total Time: 25 minutes
- Yield: 4 dozen 1x
- Category: Dessert, Snack
- Cuisine: American
Ingredients
- 2 cups almond flour (preferably from organic blanched almonds)
- 3/4 cup millet flour (preferably organic)
- 2 tsp cream of tartar
- 1 tsp baking soda
- 1/4 tsp fine sea salt
- 8 tbsp unsalted butter
- 1/2 cup coconut oil or vegan shortening
- 1 cup monk fruit sweetener (plus more for topping)
- 2 large eggs (preferably pasture raised)
Topping
- 2 tbsp ground cinnamon
- 4 tbsp monk fruit sweetener
Instructions
- Preheat your oven to 400 degrees F. Place one baking rack in the top third of your oven.
- In a medium size bowl, measure out the almond flour, millet flour, cream of tartar, baking soda, and salt. Whisk the mixture well to break up any lumps in the almond flour. Set aside.
- In the bowl of an electric stand mixer add the butter and 1 cup of monk fruit sweetener. Using the paddle attachment, mix on medium low for a few minutes until the butter and sweeter are well creamed. Add the coconut oil to the mixer and continue mixing until well combined. Please make sure the coconut oil is in its more solid form NOT completely melted. The mixture should be light and fluffy at this point. Add the eggs one at a time and mix each egg well on medium low speed before adding the next one.
- Add all of the dry ingredients to the mixer and run the machine on medium low until all ingredients are well combined. Stop the machine and scrape the bowl down, then continue mixing a little longer.
- Take the bowl off of the stand mixer, cover with a tea towel or plastic wrap and refrigerate the dough for at least 30 minutes.
- In a small bowl, combine the ingredients for the topping and mix well.
Once the dough has been chilled for 30 minutes, remove the bowl from the refrigerator. Using a small 1 1/4 ounce ice cream scoop with a trigger, scoop some dough and form it into a ball with your hands. Gently drop the dough ball into the topping and gently shake the bowl to coat the dough ball all over.
- Place the dough ball on a large baking sheet lined with a silicon baking mat or parchment paper. Gently press the dough ball down so that the top is flat. Continue rolling dough balls, coating them with topping, and pressing them down on the cookie sheet. Make sure to leave a good amount of space between the dough balls. The cookies tend to spread during baking.
- Bake each cookie sheet in the top third of your oven for approximately 10 minutes. The cookies will be golden and the coating will just be starting to crack a bit when they are done.
Transfer the cookies to a cooling rack and continue rolling the dough and baking the cookies until all of the dough has been baked. - Store the cookies in an airtight container.