
healthy molten chocolate lava cake
Healthy Molten Chocolate Lava Cake
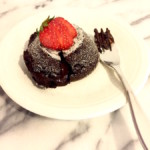
I’ve recrafted this classic dessert to make it gluten free, dairy free and free of added sugar. This version is much healthier than the original recipe, but is just as delicious. If you are looking for a healthy chocolate dessert that really satisfies, this is it! Another great thing about this recipe is that it easily doubles, triples or quadruples so that you can make up a bunch to serve a crowd or just have them ready in your freezer at a moments notice. These cakes are made in individual portions so you can bake one off anytime to satisfy a chocolate craving. How great is that? They are also very rich and filling so, one cake can easily be shared between two people if you are feeling generous. If you are baking them straight out of the freezer, you may need to extend the baking time by as much as 5 minutes so that the center is warm but still runny. You will want to enjoy them warm and straight out of the oven. These healthy molten chocolate lava cakes will be your new favorite go to dessert. Chocolate lovers meet your new best friend!
- Prep Time: 30 min
- Cook Time: 12-15 min
- Total Time: 21 minute
- Yield: 2 people 1x
- Category: Dessert
- Cuisine: American
Ingredients
- 4 ounces 85% dark chocolate (broken into pieces)
- 3 tbsp coconut oil (extra virgin, extra for greasing cups)
- 2 egg yolks (pasture raised)
- 2 egg whites (pasture raised)
- 1/4 cup monk fruit sweetener (or organic coconut sugar, ground fine*)
- 2 tbsp Almond Meal or Almond Flour (preferably organic)
- splash bourbon or liquor of your choice ( espresso vodka works great too! optional)
Instructions
- Preheat your oven to 400 degrees F.
- Using a bit of coconut oil, lightly grease two baking cups (or as many as you will need to serve your guests) and then dust the cups with a bit of almond flour. I use ramekins or disposable foil cups the sturdy kind, (not cup cake liners) but ones that can stand on their own. Set the prepared cups aside until you are done mixing the batter. I like to line up all of the baking cups on top of a sheet pan so that it is easy to move the cakes around during prep and baking.
To melt the chocolate
- Set a sauce pan 1/2 full with water over high heat. Bring the water to a boil. Once the water is boiling turn off the heat. Set a large bowl that fits securely over the top of the pan, on top of the sauce pan of boiled water. Add the broken chocolate pieces, coconut oil and liquor to the bowl. Let the chocolate sit over the pot of hot water until the chocolate is melted at least 1/2 way. Then stir the chocolate, coconut oil mixture until it is completely smooth. (There will be enough residual heat from the boiled water to melt the chocolate and coconut oil completely) Once it is melted set the bowl aside for a moment.
For the batter of the cake
- Add the egg yolks and sweetener to the bowl of a stand mixer fitted with a whisk attachment. Beat egg yolks and sugar until light yellow in color and ribbons form. About 7 minutes. (You can whisk the yolks and sweetener by hand if you do not have a mixer).
- Stream the melted chocolate into the beaten yolks and sweetener. While the mixer is running on medium low speed. The mixture will become very thick. This is okay.
- In a separate bowl, beat the egg whites until frothy. Then fold the frothy whites into the chocolate mixture. Fold the egg whites in until the cake batter is smooth and uniform in texture. You can do this by hand or with the stand mixer running on medium low.
- Remove the mixer bowl from the stand mixer and fold the almond flour into the chocolate mixture by hand. Fold in the flour gently but make sure it is all well distributed into the chocolate mixture.
- Using an ice cream scoop or depositor, divide the cake batter evenly between the prepared baking cups or ramekins. Fill the baking cups or ramekins to the rim with cake batter.
- If you have extra cake batter, prepare a few more baking cups and divide the rest of the batter evenly until the batter has all been distributed.
- Refrigerate the sheet pan with all of the filled baking cups on it for at least 10 minutes.
- If you are serving the cakes right away, after chilling the batter for 10 minutes, remove the sheet pan from the refrigerator and place it in the center of your preheated 400 degree F. oven.
- Bake the cakes for 12-15 minutes or until the edges of the cake have risen above the top of the baking cup and is set on top and on the edges. If your oven runs cold, you may need a few extra minutes.
Once the cakes are baked, remove the sheet pan from the oven and allow the cakes to cool for about a minute.
- To serve the cake, carefully take one cake and invert it on a small serving plate. Gently squeeze the foil baking cup and lightly tap on the bottom of the baking cup. Then gently lift the baking cup to release the cake. The cake should release easily from the baking cup and hold its shape. Dust the cake with powdered sweetener, add a tart sauce if you like or garnish with fresh berries.
Enjoy!
- If you wish to serve the cakes later, the unbaked cups of cake batter can stay individually wrapped in your refrigerator for up to a week. If you would like to serve them in more than a week, you can place the individually wrapped baking cups in a freezer proof container and store them in your freezer for up to 3 months. Then simply remove and unwrap the cakes from the freezer and bake as directed above. Bake one at a time or as many as you need for your guests.
Notes
- A note on sweetness: many sweeteners come in granulated form, but often times the texture is too course for baking. To create a fine texture, you can run small batches of sweetener through a spice or coffee grinder, food processor, or blender. Store the finely ground sweetener in an airtight container.
Healthy Molten Chocolate Lava Cake – I've recrafted this classic dessert to make it gluten free, dairy free and free of added sugar. This version is much healthier than the original recipe, but is just as delicious. If you are looking for a healthy chocolate dessert that really satisfies, this is it! Another great thing about this recipe is that it easily doubles, triples or quadruples so that you can make up a bunch to serve a crowd or just have them ready in your freezer at a moments notice. These cakes are made in individual portions so you can bake one off anytime to satisfy a chocolate craving. How great is that? They are also very rich and filling so, one cake can easily be shared between two people if you are feeling generous. If you are baking them straight out of the freezer, you may need to extend the baking time by as much as 5 minutes so that the center is warm but still runny. You will want to enjoy them warm and straight out of the oven. These healthy molten chocolate lava cakes will be your new favorite go to dessert. Chocolate lovers meet your new best friend! – 85% dark chocolate (broken into pieces), coconut oil (extra virgin, extra for greasing cups), egg yolks (pasture raised), egg whites (pasture raised), monk fruit sweetener (or organic coconut sugar, ground fine*), Almond Meal or Almond Flour (preferably organic), bourbon or liquor of your choice ( espresso vodka works great too! optional), , Preheat your oven to 400 degrees F. ; Using a bit of coconut oil, lightly grease two baking cups (or as many as you will need to serve your guests) and then dust the cups with a bit of almond flour. I use ramekins or disposable foil cups the sturdy kind, (not cup cake liners) but ones that can stand on their own. Set the prepared cups aside until you are done mixing the batter. I like to line up all of the baking cups on top of a sheet pan so that it is easy to move the cakes around during prep and baking.; To melt the chocolate: Set a sauce pan 1/2 full with water over high heat. Bring the water to a boil. Once the water is boiling turn off the heat. Set a large bowl that fits securely over the top of the pan, on top of the sauce pan of boiled water. Add the broken chocolate pieces, coconut oil and liquor to the bowl. Let the chocolate sit over the pot of hot water until the chocolate is melted at least 1/2 way. Then stir the chocolate, coconut oil mixture until it is completely smooth. (There will be enough residual heat from the boiled water to melt the chocolate and coconut oil completely) Once it is melted set the bowl aside for a moment.; For the batter of the cake: Add the egg yolks and sweetener to the bowl of a stand mixer fitted with a whisk attachment. Beat egg yolks and sugar until light yellow in color and ribbons form. About 7 minutes. (You can whisk the yolks and sweetener by hand if you do not have a mixer). ; Stream the melted chocolate into the beaten yolks and sweetener. While the mixer is running on medium low speed. The mixture will become very thick. This is okay. ; In a separate bowl, beat the egg whites until frothy. Then fold the frothy whites into the chocolate mixture. Fold the egg whites in until the cake batter is smooth and uniform in texture. You can do this by hand or with the stand mixer running on medium low. ; Remove the mixer bowl from the stand mixer and fold the almond flour into the chocolate mixture by hand. Fold in the flour gently but make sure it is all well distributed into the chocolate mixture. ; Using an ice cream scoop or depositor, divide the cake batter evenly between the prepared baking cups or ramekins. Fill the baking cups or ramekins to the rim with cake batter. ; If you have extra cake batter, prepare a few more baking cups and divide the rest of the batter evenly until the batter has all been distributed. ; Refrigerate the sheet pan with all of the filled baking cups on it for at least 10 minutes. ; If you are serving the cakes right away, after chilling the batter for 10 minutes, remove the sheet pan from the refrigerator and place it in the center of your preheated 400 degree F. oven. ; Bake the cakes for 12-15 minutes or until the edges of the cake have risen above the top of the baking cup and is set on top and on the edges. If your oven runs cold, you may need a few extra minutes.
Once the cakes are baked, remove the sheet pan from the oven and allow the cakes to cool for about a minute. ; To serve the cake, carefully take one cake and invert it on a small serving plate. Gently squeeze the foil baking cup and lightly tap on the bottom of the baking cup. Then gently lift the baking cup to release the cake. The cake should release easily from the baking cup and hold its shape. Dust the cake with powdered sweetener, add a tart sauce if you like or garnish with fresh berries.
Enjoy!
; If you wish to serve the cakes later, the unbaked cups of cake batter can stay individually wrapped in your refrigerator for up to a week. If you would like to serve them in more than a week, you can place the individually wrapped baking cups in a freezer proof container and store them in your freezer for up to 3 months. Then simply remove and unwrap the cakes from the freezer and bake as directed above. Bake one at a time or as many as you need for your guests. ; ; – <ul>
<li>A note on sweetness: many sweeteners come in granulated form, but often times the texture is too course for baking. To create a fine texture, you can run small batches of sweetener through a spice or coffee grinder, food processor, or blender. Store the finely ground sweetener in an airtight container.</li>
</ul> – Dessert – American – Dairy Free – Gluten Free – Healthy Comfort Food – Lectin Free – Low Carb – Vegetarian – Eating Enchanted